Building Your Health Monitoring System with Arduino, Streamlit, and GPT-3.5 Turbo🌡️💻
Welcome back to our series on thinking like a computer science student! In this second blog, we’re diving deep into the realm of health monitoring systems using Arduino, Streamlit, and GPT-3.5 Turbo. Get ready for an exhilarating journey as we construct our very own HealthMate! 🚀
🏥 Introduction
Have you ever envisioned having a personalized health companion? Well, dream no more! HealthMate not only monitors your vital signs in real-time but also provides tailored health advice using the power of GPT-3.5 Turbo. Let’s roll up our sleeves and create our own health buddy! 🩺💬
🌟 Meet HealthMate

HealthMate is not your average health monitoring system. It’s a virtual health buddy that watches over your heart rate and temperature while giving you personalized health advice. Let’s dive into the steps and create your very own health companion! 🎩🔧
🚀 Getting Started
Step 1: Setting Up
- Arduino IDE
- Python 3.x
- Pip (included with Python installation)
Clone the HealthMate repository from GitHub:
git clone https://github.com/0aaryan/healthMate.git
Navigate to the project directory:
cd healthMate
Step 2: Python Environment Setup
Create a virtual environment for your project. Open a terminal or command prompt and run:
# For Linux and macOS
python3 -m venv venv

# For Windows
python -m venv venv
Activate the virtual environment:
# For Linux and macOS
source venv/bin/activate

# For Windows
venv\Scripts\activate
Step 3: Python Script Execution
Now, let’s set up the Python environment:
- Install required Python packages:
pip install -r requirements.txt
- Create a
.envfile in the project directory. Add your OpenAI API key:
OPENAI_API_KEY=your_openai_api_key
Replace your_openai_api_key with your actual OpenAI GPT-3.5 Turbo API key.
- Run the Python script with Streamlit:
streamlit run chat_app.py
And there you have it! Your HealthMate application is up and running. Interact with it, enter your health data, and receive personalized advice from your virtual health buddy.
🚀 Deploying on Streamlit Cloud

To share your HealthMate with the world, let’s deploy it on Streamlit Cloud. Follow these simple steps:
- Click on the Deploy button in the Streamlit app.
- Connect your GitHub repository containing the HealthMate code.
- Select the app to deploy and add necessary details in the Streamlit Cloud dashboard.
And voila! Your HealthMate is now accessible globally. Share the link and let others experience the wonders of your virtual health companion.
🎁 Bonus Section: Arduino Connection

Note: This step is optional. You can skip it if you don’t have an Arduino board or wish to connect it later.
Connect your Arduino board to your computer via USB and follow these detailed steps:
- Open the Arduino IDE.
- Load the Arduino code from
arduino_code.ino. - Select the correct board model and port from the “Tools” menu.
- Click “Upload” to send the code to the Arduino board.
Understanding the Arduino Code
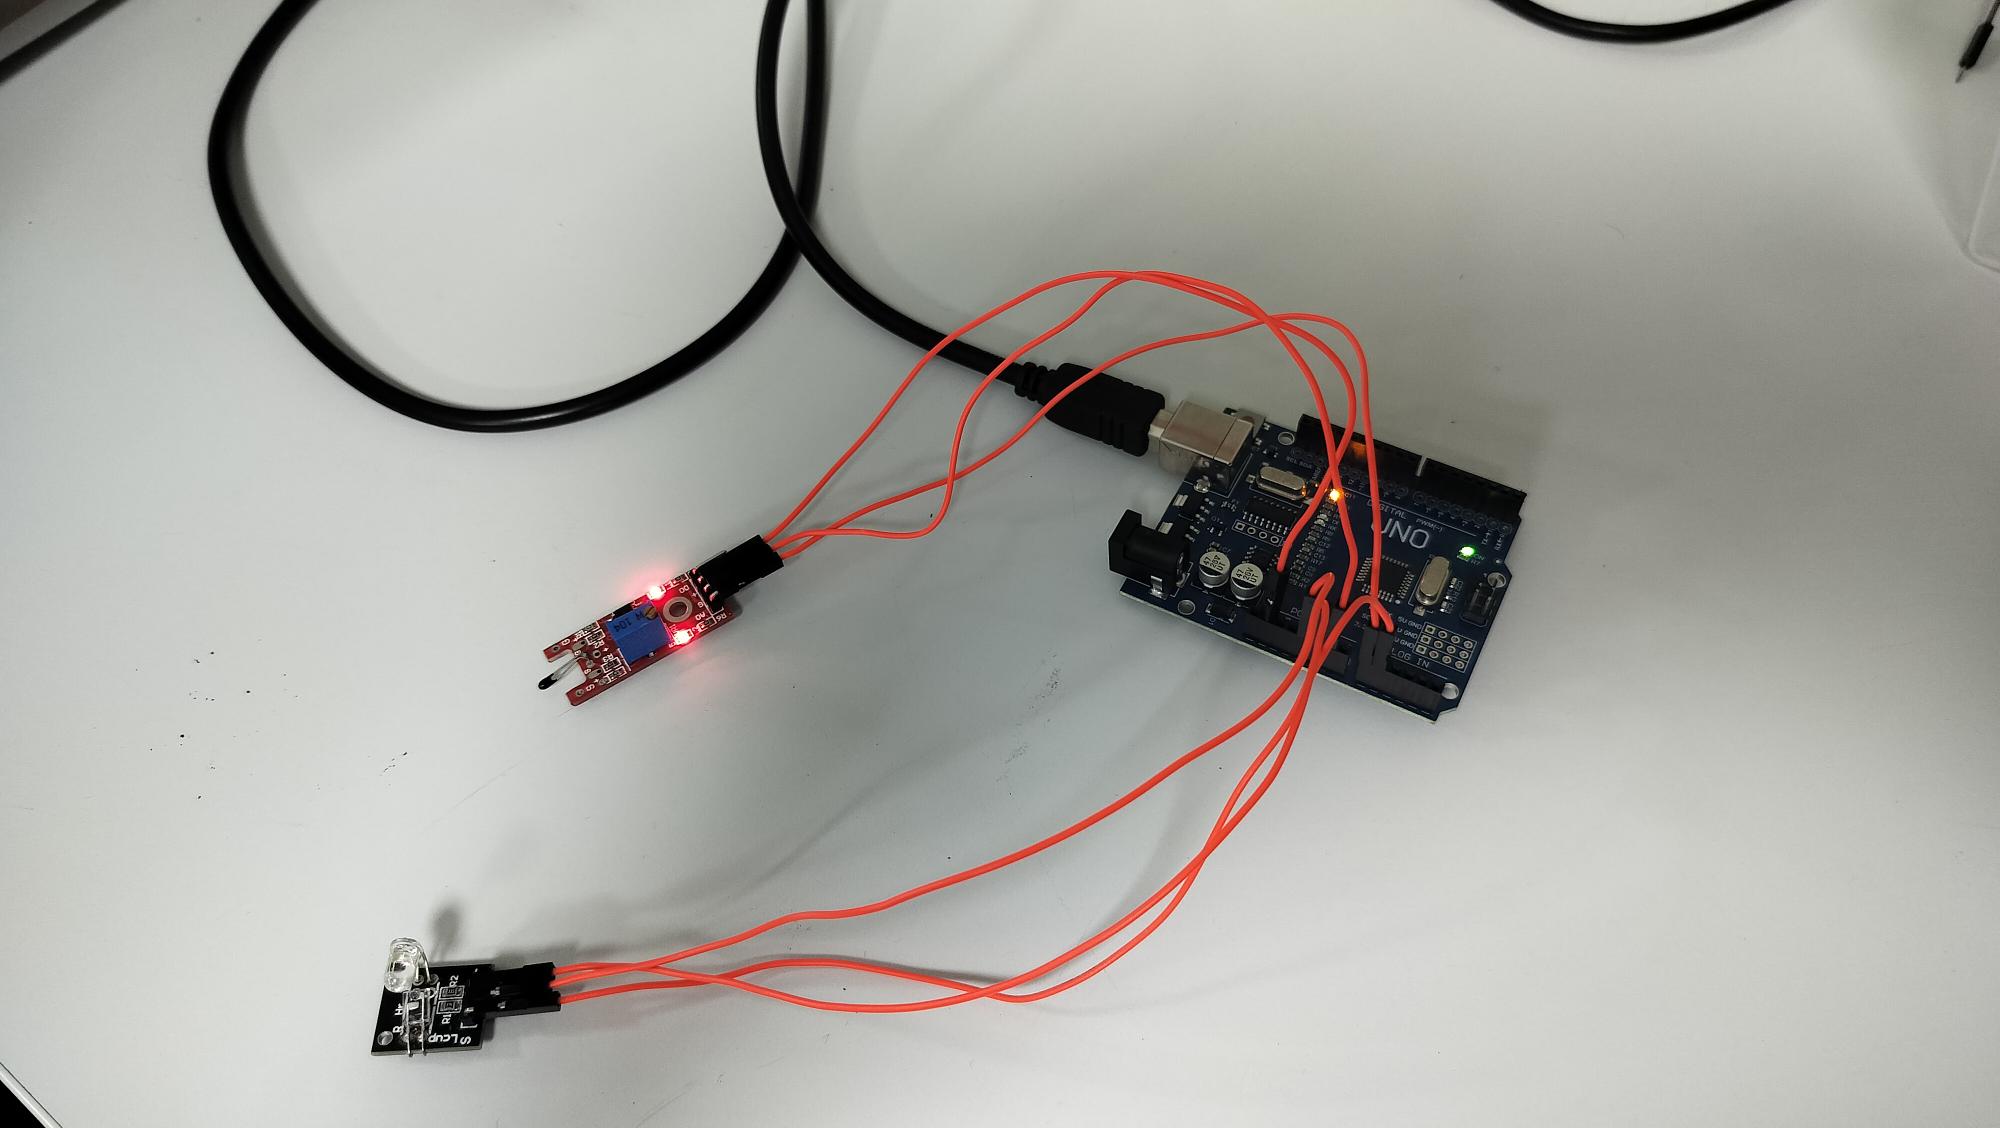
The arduino_code.ino file contains the code for reading data from sensors, calculating average heart rate and temperature, and sending this information to the Python script. We are using a KY028 temperature sensor and a KY039 heart rate sensor.
#define samp_siz 4
#define rise_threshold 4
#define tempPin 0

// Pulse Monitor  Test Script
int sensorPin = 1;

void setup() {
    Serial.begin(9600);
}

void  loop ()
{
    float reads[samp_siz], sum;
    long int now, ptr;
    float  last, reader, start;
    float first, second, third, before, print_value;
    bool rising;
    int rise_count;
    int n;
    long int last_beat;
    float temp = analogRead(tempPin);

    for (int i = 0; i < samp_siz; i++)
      reads[i] = 0;
    sum = 0;
    ptr = 0;

    while(1)
    {
      // calculate an average of the  sensor
      // during a 20 ms period (this will eliminate
      // the 50  Hz noise caused by electric light
      n = 0;
      start = millis();
      reader = 0.;
      do
      {
        reader += analogRead (sensorPin);
        n++;
        now = millis();
      }
      while (now < start +  20);
      reader /= n;  //

 we got an average
      // Add the  newest measurement to an array
      // and subtract the oldest measurement from  the array
      // to maintain a sum of last measurements
      sum -= reads[ptr];
      sum += reader;
      reads[ptr] = reader;
      last = sum / samp_siz;
      // now last holds the average of the values in the array

      // check  for a rising curve (= a heart beat)
      if (last > before)
      {
        rise_count++;
        if (!rising && rise_count > rise_threshold)
        {
          rising  = true;
          first = millis() - last_beat;
          last_beat = millis();

          // Calculate the weighed average of heartbeat rate
          // according  to the three last beats
          print_value = 60000. / (0.4 * first + 0.3 *  second + 0.3 * third);
          Serial.print(print_value);
          Serial.print(",");
          Serial.print(temp);
          Serial.print('\n');
          third = second;
          second  = first;
        }
      }
      else
      {
        //  Ok, the curve is falling
        rising = false;
        rise_count = 0;
      }
      before = last;

      ptr++;
      ptr  %= samp_siz;
    }
}
Sensor Connection
KY028 Temperature Sensor:
- Connect the KY028 temperature sensor to the Arduino analog pin 0 (
tempPinin the code).
- Connect the KY028 temperature sensor to the Arduino analog pin 0 (
KY039 Heart Rate Sensor:
- Connect the KY039 heart rate sensor to the Arduino analog pin 1 (
sensorPinin the code).
- Connect the KY039 heart rate sensor to the Arduino analog pin 1 (

Now you have a fully functional HealthMate, equipped with Arduino connectivity for real-time sensor data. 🌟
📚 Conclusion
Congratulations! You’ve successfully built your Health Monitoring System, combining the power of Arduino, Streamlit, and GPT-3.5 Turbo. Embrace the world of health technology and continue thinking like a computer science student in every project you undertake. Stay curious and keep innovating! 💡💪
